
If your garage has become a dumping ground for boxes, broken tools, and things you swear you will deal with someday, you are not alone. The good news is that reclaiming that space does not require tearing down walls or hiring a full renovation crew. With a few smart upgrades and some strategic organizing, you can turn a cluttered garage into a functional part of your home again. This guide walks through practical, budget-friendly ways to get there without the stress of a major remodel.
Start With a Ceiling-Mounted Storage System

The ceiling of your garage is probably the most underused square footage in your entire house. Installing overhead racks lets you store seasonal items, luggage, and holiday decorations well above head height, freeing up the floor for cars and workbenches. Most systems mount directly into ceiling joists and can hold several hundred pounds without any structural changes.
When shopping for a system, pay attention to weight capacity and mounting hardware quality rather than just size. Entry-level racks typically hold 200 to 300 pounds, while heavy-duty models can support 600 pounds or more, which matters if you’re storing large plastic bins, camping gear, or a kayak. Look for adjustable-height brackets so you can customize the drop distance based on your ceiling height and how much clearance you need for your vehicle.
Installation usually takes an hour or two with basic tools like a stud finder, drill, and level, though a helper makes lifting the frame into place much easier. Make sure you’re anchoring into actual joists or ceiling framing rather than drywall alone, since drywall anchors won’t support meaningful weight over time.
Before buying, measure your garage’s ceiling height and the clearance above your car’s roofline. A gap of at least 18 to 24 inches between the stored items and your vehicle helps avoid accidental scrapes or dents when pulling in and out.
Before you buy a kit, measure the clearance between your garage door track and the ceiling so the racks do not interfere with the door opening. Most torsion springs and tracks need at least 12 to 18 inches of clearance, and ceiling storage platforms typically hang down another 12 to 22 inches once installed, so grab a tape measure and check this first to avoid a return trip to the store.
Also note the height of your ceiling joists or trusses, since most ceiling-mounted units need to be anchored directly into structural framing rather than drywall alone. If your garage has exposed joists, this is straightforward, but a finished ceiling may require a stud finder or a peek in the attic space above.
Take stock of what you actually need to store so you buy the right size platform instead of guessing. A typical 4×8-foot rack can hold 200 to 600 pounds depending on the model, which is plenty for seasonal decorations, camping gear, or bins of off-season clothing, but heavier items like snow tires or power tools may call for a sturdier, lower-hanging option.
Sketch out roughly how many bins you own and their dimensions, then compare that against the platform’s usable footprint before ordering. It is also worth leaving a few inches of buffer on each side so bins slide in and out easily without you having to wrestle them free every time.
- Look for adjustable-height racks that accommodate taller SUVs or trucks, typically offering 12–24 inches of clearance adjustment
- Choose weight-rated systems clearly labeled for their maximum load, generally ranging from 250 to 600 pounds per rack
- Measure your ceiling height and joist spacing before buying, since most systems need at least 8 feet of clearance and secure mounting into structural framing, not drywall alone
- Keep frequently used items on lower shelves and rarely used items up top, reserving the highest points for seasonal decorations or camping gear
- Add hooks along the same ceiling grid for bikes or ladders, spacing them to avoid clashing with garage door tracks or opener rails
- Leave a few inches of buffer space around parked vehicles and swinging doors to prevent accidental scrapes when loading or unloading stored items
Rethink Your Garage Door Before Adding More Storage
It is easy to overlook the door itself when planning a garage overhaul, but an outdated or poorly insulated door can waste both space and energy. Older garage doors often have bulky torsion springs or track systems that eat into usable ceiling and wall space, limiting where you can install shelving. Newer models are more compact and can be paired with high-lift or low-headroom track kits that free up several extra inches on both sides of the opening.
If your current door is showing its age, a replacement does not have to be a huge project. Many homeowners are surprised at how much clearance they gain simply by upgrading to a slimmer track system designed for modern garage doors.
- Insulated doors reduce temperature swings that affect stored items
- Slimmer tracks leave more wall space for shelving or pegboards
- Smart openers let you monitor the door remotely for added security
Build a Wall-Mounted Workbench That Folds Away
A fixed workbench can eat up a huge chunk of floor space, especially in smaller garages. A fold-down or wall-mounted bench gives you a sturdy work surface when you need it and disappears flat against the wall when you do not. These are simple to install with basic hardware and a few hours on a weekend.
The basic build usually involves a plywood or MDF tabletop, a piano hinge along the back edge, and folding brackets or metal support arms that lock the surface horizontal and release it to swing down. A 3/4-inch plywood top measuring around 24 by 48 inches works well for most hobby tasks, and you can size it up if you have the wall space to spare. Anchor the hinge and brackets into wall studs, not just drywall, since a loaded workbench puts real stress on the mounting points.
Consider weight capacity before you finalize your design. Folding shelf brackets rated for 300 to 500 pounds per pair will handle most woodworking, small engine repair, or general tinkering without flexing under load.
For added stability, add a hinged leg or a diagonal support brace that swings down to the floor when the bench is in use. This takes pressure off the wall brackets and keeps the surface from wobbling when you’re hammering, clamping, or leaning into a project.
If you want extra convenience, mount a short strip of pegboard or a magnetic tool strip above the bench so tools stay within reach but off the surface. When you’re done, fold the bench up, and you’ve reclaimed several square feet of usable floor space instantly.
Pair the bench with a pegboard or slat wall system above it so tools stay within reach but off the surface. A standard 4×8-foot pegboard panel provides enough hook space for dozens of hand tools, and mounting it 6 to 8 inches above the bench keeps everything visible without crowding your workspace when the bench is folded down.
This setup works especially well for anyone who handles small appliance repair projects at home, since it keeps parts organized and visible instead of scattered across the floor. Use labeled bins or small magnetic trays on the slat wall to hold screws, fuses, and other tiny components that are easy to lose mid-repair. Clear plastic containers work well here, since you can identify contents at a glance without opening each one.
If your appliance repair work involves anything electrical, consider adding a small shelf or outlet strip near the pegboard for testing equipment like multimeters. Keeping power tools and diagnostic gear close to the work surface cuts down on trips back and forth to other parts of the garage, making even quick fixes more efficient.
- Choose plywood or MDF at least three quarters of an inch thick for durability; a 2×3 or 2×4 frame underneath adds extra rigidity for heavier tools
- Size the tabletop to fit your wall space, but keep it around 24 to 36 inches deep for comfortable working room
- Add a piano hinge for smooth folding action, mounting it to a ledger board that’s securely screwed into wall studs
- Install a support leg or bracket that locks in place when the bench is down, such as a folding table leg bracket or a simple hinged 2×4 with a barrel bolt lock
- Sand and seal the plywood edges to prevent splintering, especially if the bench will see frequent use
- Test the fold-down and lock mechanism a few times before loading it with tools to confirm it holds weight securely
Convert Corners Into Vertical Storage Zones

Corners are notoriously wasted space in most garages, yet they are ideal for tall, narrow shelving units. Freestanding corner shelves or custom-built triangular units can hold paint cans, cleaning supplies, or sports equipment without intruding on walking paths. This is one of the simplest changes you can make without any tools beyond a drill and a level.
Consider labeling bins by category so everyone in the household knows where things belong. A little bit of organization here prevents the corners from slowly filling back up with random clutter over time.
- Use clear bins so contents are visible at a glance
- Group items by season or frequency of use
- Anchor tall units to the wall to prevent tipping
Protect the Garage Floor With Sealcoating
A cracked or stained concrete floor makes a garage feel messier than it actually is, even after you have organized everything else. Applying a durable sealant protects the surface from oil stains, moisture, and gradual wear, and it also makes cleanup far easier. Interestingly, the same asphalt sealing techniques used on driveways can be adapted for concrete garage floors to extend their lifespan significantly.
A freshly sealed floor also reflects more light, making the whole space feel brighter and larger than before. This is a weekend project that pays off both in appearance and in long-term maintenance savings.
- Clean and degrease the floor thoroughly before applying sealant
- Choose a slip-resistant formula if the garage doubles as a workshop
- Reapply every two to three years depending on foot and vehicle traffic
Address Plumbing Issues Before They Take Over Storage Areas
Many garages double as the access point for a home’s water lines, water heater, or utility sink, which means plumbing problems can quietly eat into your usable space. A hidden leak under the slab can force you to keep an entire corner clear for potential repairs, and ignoring it only makes things worse. If you notice damp spots, unexplained water bills, or warm patches on the floor, it may be time to call in a professional for slab leak repair before the damage spreads further.
Similarly, a slow-draining utility sink can become a source of frustration and standing water if left unaddressed. Scheduling drain repair early prevents backups that could damage stored items or create mold issues in an enclosed space.
- Watch for cracks in the slab near plumbing fixtures
- Keep storage bins elevated off the floor near water lines
- Address unusual odors near drains right away rather than masking them
Manage HVAC and Furnace Equipment Without Sacrificing Space
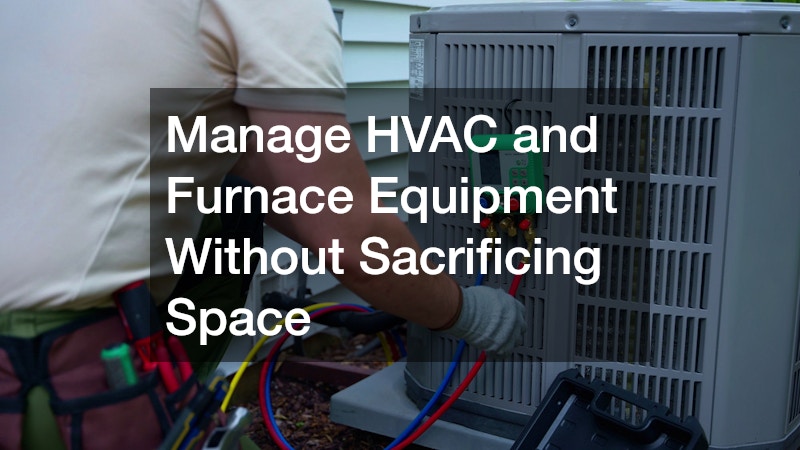
If your furnace, water heater, or air handler lives in the garage, it can dominate an entire wall if not planned around properly. Building a simple enclosure or shelving unit around the equipment, while still leaving clearance for ventilation and access panels, can reclaim several square feet of otherwise dead space. Routine furnace repair is much easier to schedule when the unit is not buried behind years of accumulated boxes.
The same goes for any ductwork or HVAC components routed through the garage ceiling or walls. Keeping a clear path to these systems means a technician performing HV AC repair can work quickly without having to move stacks of stored items first.
- Leave at least two feet of clearance around furnace access panels
- Label shut-off valves and electrical panels clearly
- Avoid stacking flammable materials near heating equipment
Keep Seasonal AC Components Accessible

Many homes route the indoor air handler or line sets for the air conditioning system through the garage, and these components need occasional attention too. Boxing them in completely with shelving can make simple maintenance a hassle and may even void warranty terms tied to accessibility requirements. When AC repair is needed during the hottest months of the year, a technician should not have to dig through storage bins just to reach the unit.
A smart solution is to build shelving with a hinged or removable panel section directly in front of the equipment. This keeps the area looking tidy while still allowing quick access whenever it is needed.
- Use open-frame shelving instead of solid panels near AC components
- Mark the breaker or disconnect switch location clearly
- Schedule a seasonal check-up before extreme heat arrives
Plan for Roof and Structural Maintenance From Below
The garage ceiling is often the first place that reveals a roofing problem, whether it is a water stain, a sagging spot, or a musty smell after heavy rain. Keeping stored boxes away from the perimeter walls makes it easier to spot these warning signs early. If you notice active dripping or a bulge in the ceiling, contacting a roofing contractor promptly can prevent a small issue from becoming a major structural repair.
Storms do not wait for convenient timing, so it helps to know who to call if a sudden leak appears above your garage. In severe cases, emergency roof repair services can install a temporary patch to protect your belongings until permanent repairs are scheduled.
- Check ceiling corners and seams monthly for discoloration
- Keep a tarp on hand for temporary protection during storms
- Trim overhanging branches that could damage the roof during high winds
Reclaiming a wasted garage does not require ripping out walls or spending a fortune on a full renovation. Small, targeted upgrades like overhead storage, a folding workbench, and a sealed floor can transform the space in a single weekend. Just as important is staying ahead of the maintenance issues that quietly steal space over time, from plumbing concerns to roofing and HVAC upkeep. Start with one or two projects from this list, and you will likely be surprised how much usable space was hiding in plain sight all along.